
Insert Sets of Items in Complex Layouts
Some crosstab layouts require more than a simple
drag-and-drop operation when you want to insert sets of items, such
as in asymmetrical crosstabs.
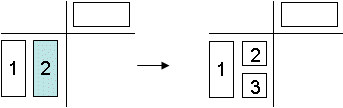
- Insert data above or below a selected set in nested rows. For
example, select set 2, right-click the desired data in the source
tree, and click Insert, Below Selected
Set to create set 3.
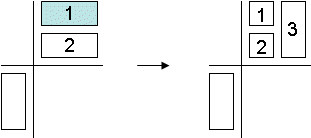
- This example uses nested columns. Select set 1 in the columns,
right-click the desired data in the source tree, and click Insert, After
Selected Set to create set 3.
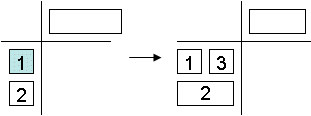
- For example, select set 1, right-click the desired data in the
source tree, and click Insert, After
Selected Set to create set 3.
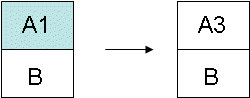
- Replace a selection-based set with one or more items from the
same hierarchy to create a new set instead of appending the selected
items to the existing set.
For more instructions, see Example - Create an Asymmetrical Crosstab.
Procedure
- Select the target location in the crosstab.
- In the source tree, right-click the item that you want to insert.
- From the Insert menu, select the command that you need.