You can create a report that drills through
to itself so that users can view detailed information in the same
report.
In this topic, you learn how to create a report
that shows revenue by each retailer. Users can access detailed order
information for a particular retailer.
It should take 20-25
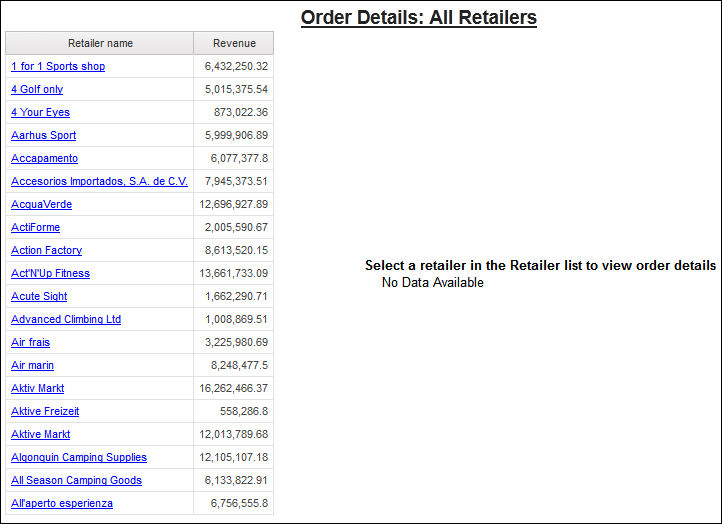
minutes to complete this topic, and your report will look like this.
Figure 1. A report with drill-through access to itself
Procedure
- Create a new blank report that uses the GO Data
Warehouse (query) package.
- Add a table with two columns and one row.
- Add a list object to each column in the table.
- Open Sales and Marketing (query),
then open Sales (query). Add these data items
to the first list:
- Retailer name in Retailers
- Revenue in Sales fact
Tip: Use the
Source tab

.
- Set the sort order for the Retailer name column
to Sort Ascending.
- Add these data items to the second list:
- Retailer name in Retailers
- Order number in Sales order
- Date in Time
- Product in Products
- Quantity in Sales fact
- Revenue in Sales fact
Tip: To simultaneously add all the data items to
the list, Ctrl+click the items before dragging them to the list.
- In the second list, select the Retailer name list
column and in the Properties pane, set its Render property
to No.
- In the second list, create the following parameterized
filter:
[Retailer name]=?Selected retailer?
- Save the report.
- In the left list, right-click the Retailer name column
(and not the column title) and click Drill-Through Definitions.
- Create a new drill-through definition.
- Specify the report as the target report.
- Under Parameters, click the edit
button.
- Set the Selected retailer parameter
to pass data item values using the Retailer name data
item.
- In the Toolbox tab, add a value
prompt under the table.
Because you are setting up
drill-through access to the same report, you must add a prompt with
a default value so that users are not prompted when they run the report.
- In the Prompt Wizard, specify that
the prompt is to use the existing parameter named Selected
retailer, and click Finish.
- Click the value prompt.
- In the Properties pane, double-click
the Default Selections property and add a simple
selection named NoRetailer.
- Set the following properties:
- Required to No
- Hide Adornments to Yes
- Visible to No
- Create a title for the report.
- In the Toolbox tab, add a block
above the table.
- Click the block and, in the Properties pane,
set the class to Report title area.
- Insert a text item above the table. Type the following
text, adding a blank space at the end:
Order
Details:
- In the Toolbox tab, add the following
layout calculation immediately following the text item:
 if(ParamDisplayValue('Selected retailer')='NoRetailer')
 then 'All Retailers' else (ParamDisplayValue('Selected retailer'))
When
the report runs, the report title changes to reflect the retailer
selected by the user. If no retailer is selected, 'All Retailers'
appears.
- Click the text item and the layout calculation and,
in the Properties pane, set the class to Report
title text.
- Pause the pointer over the condition explorer button and
click Variables.
Use conditional
formatting to show a message above the second list when users have
not selected a retailer from the first list.
- Create a Boolean variable named HighLevel:
ParamDisplayValue('Selected
retailer')<>'NoRetailer'
- Pause the pointer over the page explorer button and click Page1.
- In the Toolbox tab, add a block
above the second list.
- Insert a text item in the block with the following text:
Select a retailer in the Retailer list to view order details
- Set the font style for the text to bold.
- Click the text item and, in the Properties pane,
set the Style Variable property to the HighLevel variable.
- Pause the pointer over the condition explorer and click
the Yes value for the HighLevel variable.
- Set the Visible property for the
text item to No.
- Triple-click the explorer bar to turn off conditional formatting.
- Run the report to view what it will look like for your
users.
Results
A list appears on the left that shows revenue for each
retailer. When users click a retailer, order information for the selected
retailer appears in the second list. To return to the original report,
in IBM® Cognos® Viewer, click Previous Report.
For
more information, see the following references: